Operating System Installation
Remote agents are needed to perform the installation of an operating system. Each location can be assigned to a proper remote agent using the provisioning server. If you would like to learn more about the configuration of remote agents and provisioning servers, please refer to this page.
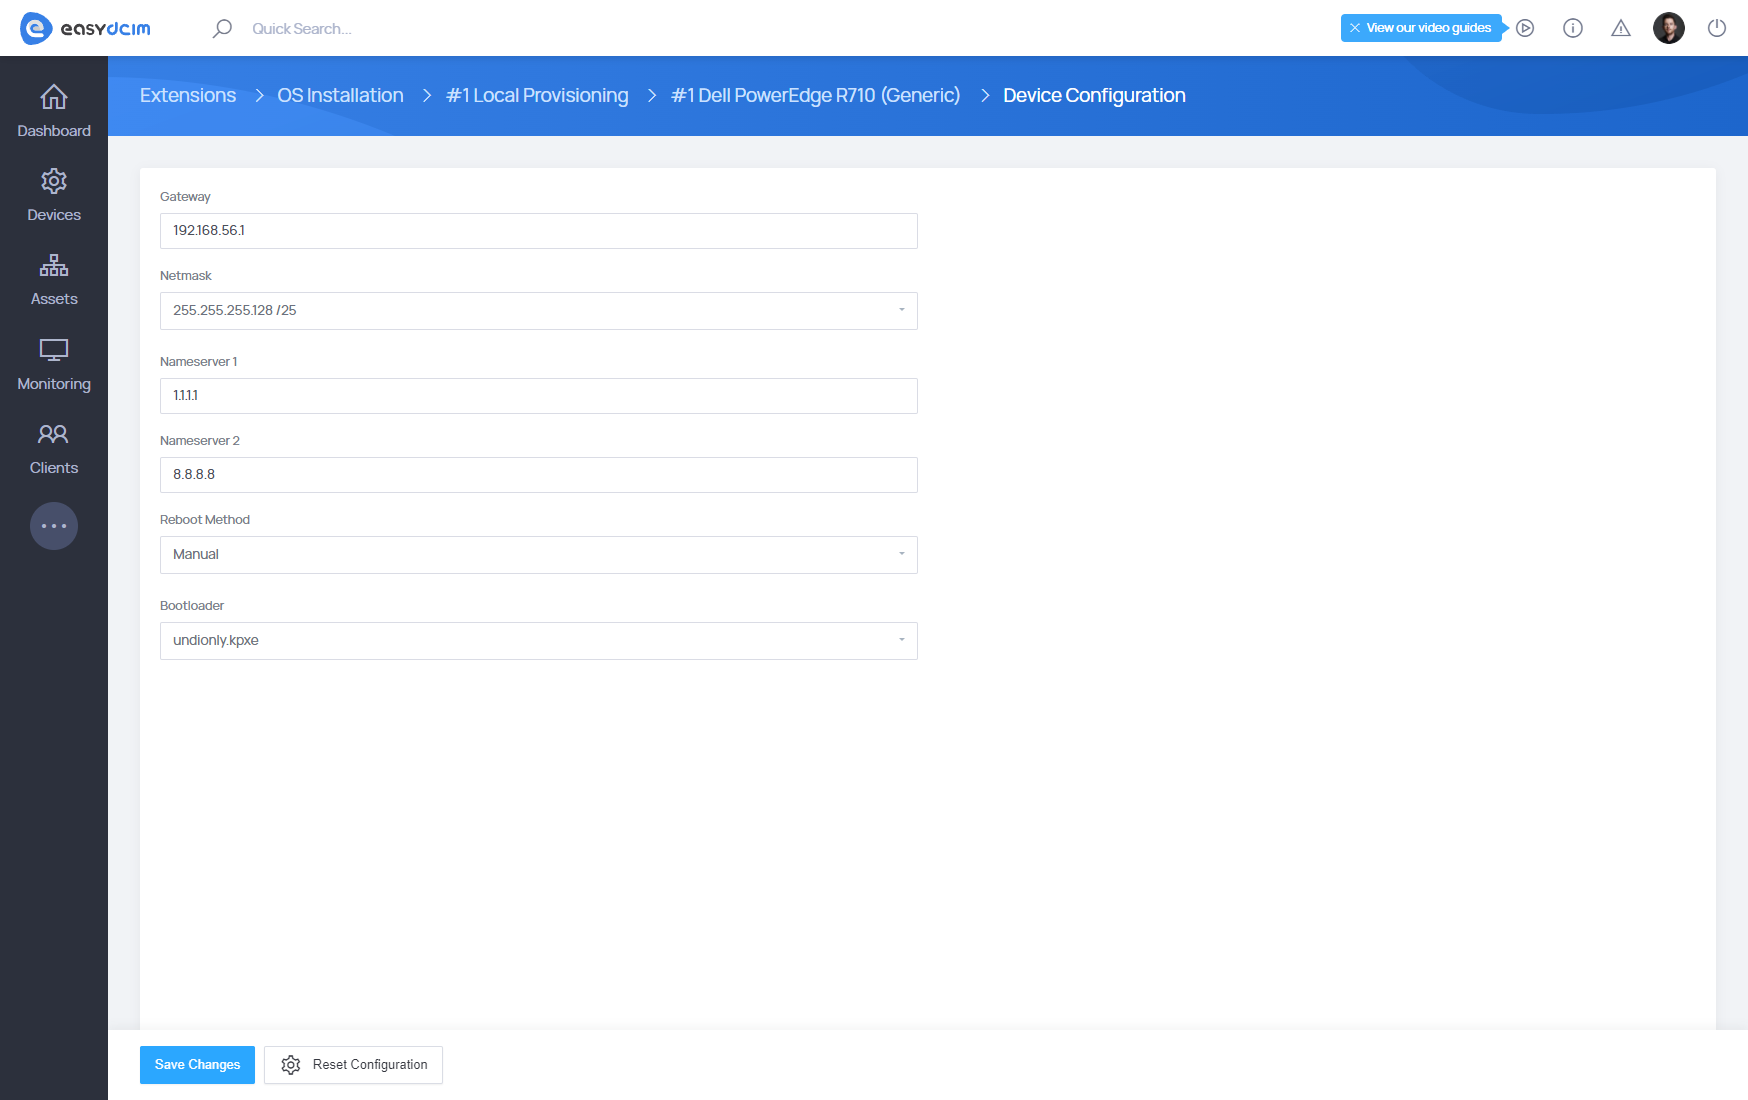
Device network configuration
When you install an operating system on a device for the first time using EasyDCIM, you have to adjust the network configuration to this device. To do so, use the “Configuration” option. By default, each device uses the global settings of the installation extension for the following fields: Nameserver 1, Nameserver 2, Reboot Method or Bootloader.
Basic configuration (for IPv4)
- Parent IP Address - always downloaded from the metadata of the IP address of the given server
- Additional IP Addresses - always downloaded from the metadata of additional IP addresses of the given server
- Netmask - taken from the device settings
- Gateway - taken from the device settings
- Nameserver 1 - downloaded from the device settings
- Nameserver 2 - downloaded from the device settings
Configuration when the integration with the IPAM extension (for IPv4) is enabled
- Parent IP Address - always downloaded from the metadata of the IP address of the given server.
- Additional IP Addresses - always downloaded from the metadata of additional IP addresses of the given server.
- Netmask - taken from the subnet settings in the IPAM extension. For example, if the metadata value of the IP address is 192.168.56.3, the system will automatically search for the subnet assigned to this device which contains the specified IP address in the IPAM extension. If such a subnet is found, the appropriate Netmask value will be set based on this subnet.
- Gateway - downloaded from the subnet settings in the IPAM extension. For example, if the metadata value of the IP address is 192.168.56.3, the system will automatically search for the subnet assigned to this device which contains the specified IP address in the IPAM extension. If such a subnet is found, the appropriate Gateway value will be set based on this subnet.
- Nameserver 1 - downloaded from the subnet settings in the IPAM extension. For example, if the metadata value of the IP address is 192.168.56.3, the system will automatically search for the subnet assigned to this device which contains the specified IP address in the IPAM extension. If such a subnet is found, the appropriate Nameserver1 value will be set based on this subnet.
- Nameserver 2 - downloaded from the subnet settings in the IPAM extension. For example, if the metadata value of the IP address is 192.168.56.3, the system will automatically search for the subnet assigned to this device which contains the specified IP address in the IPAM extension. If such a subnet is found, the appropriate Nameserver 2 value will be set based on this subnet.
Operating system installation
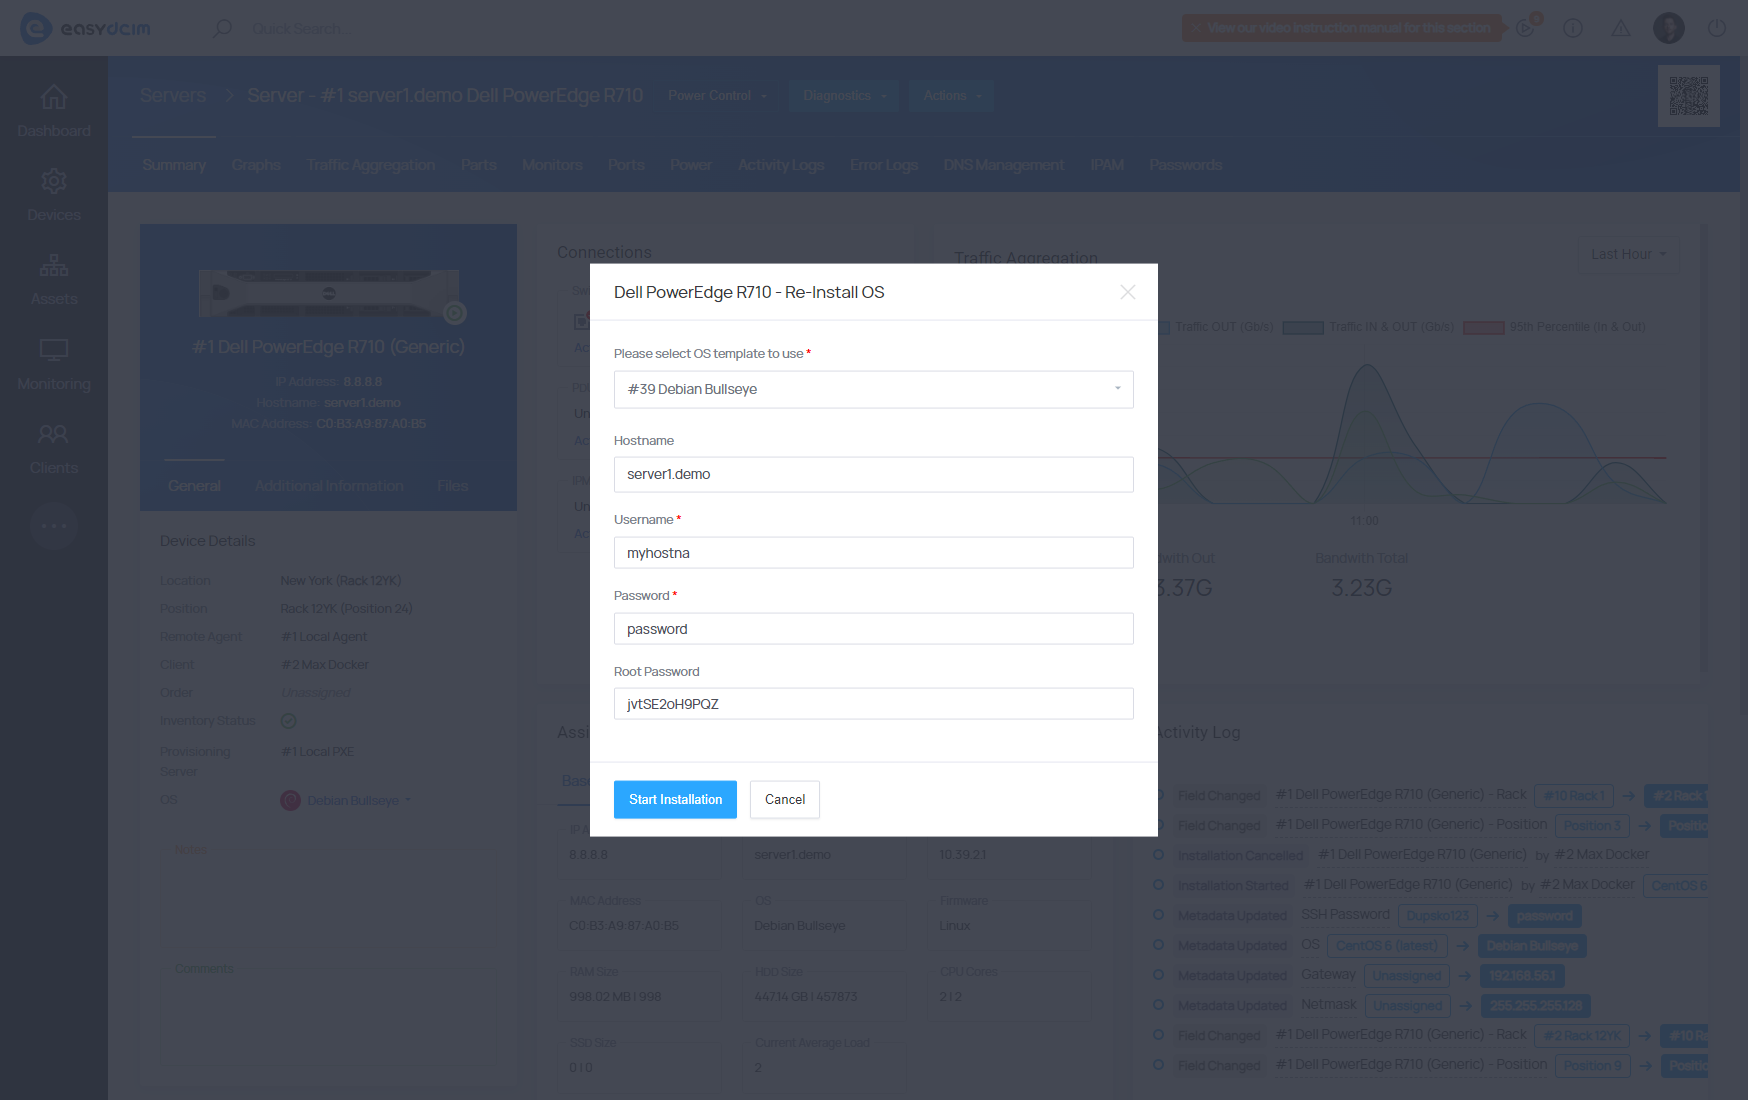
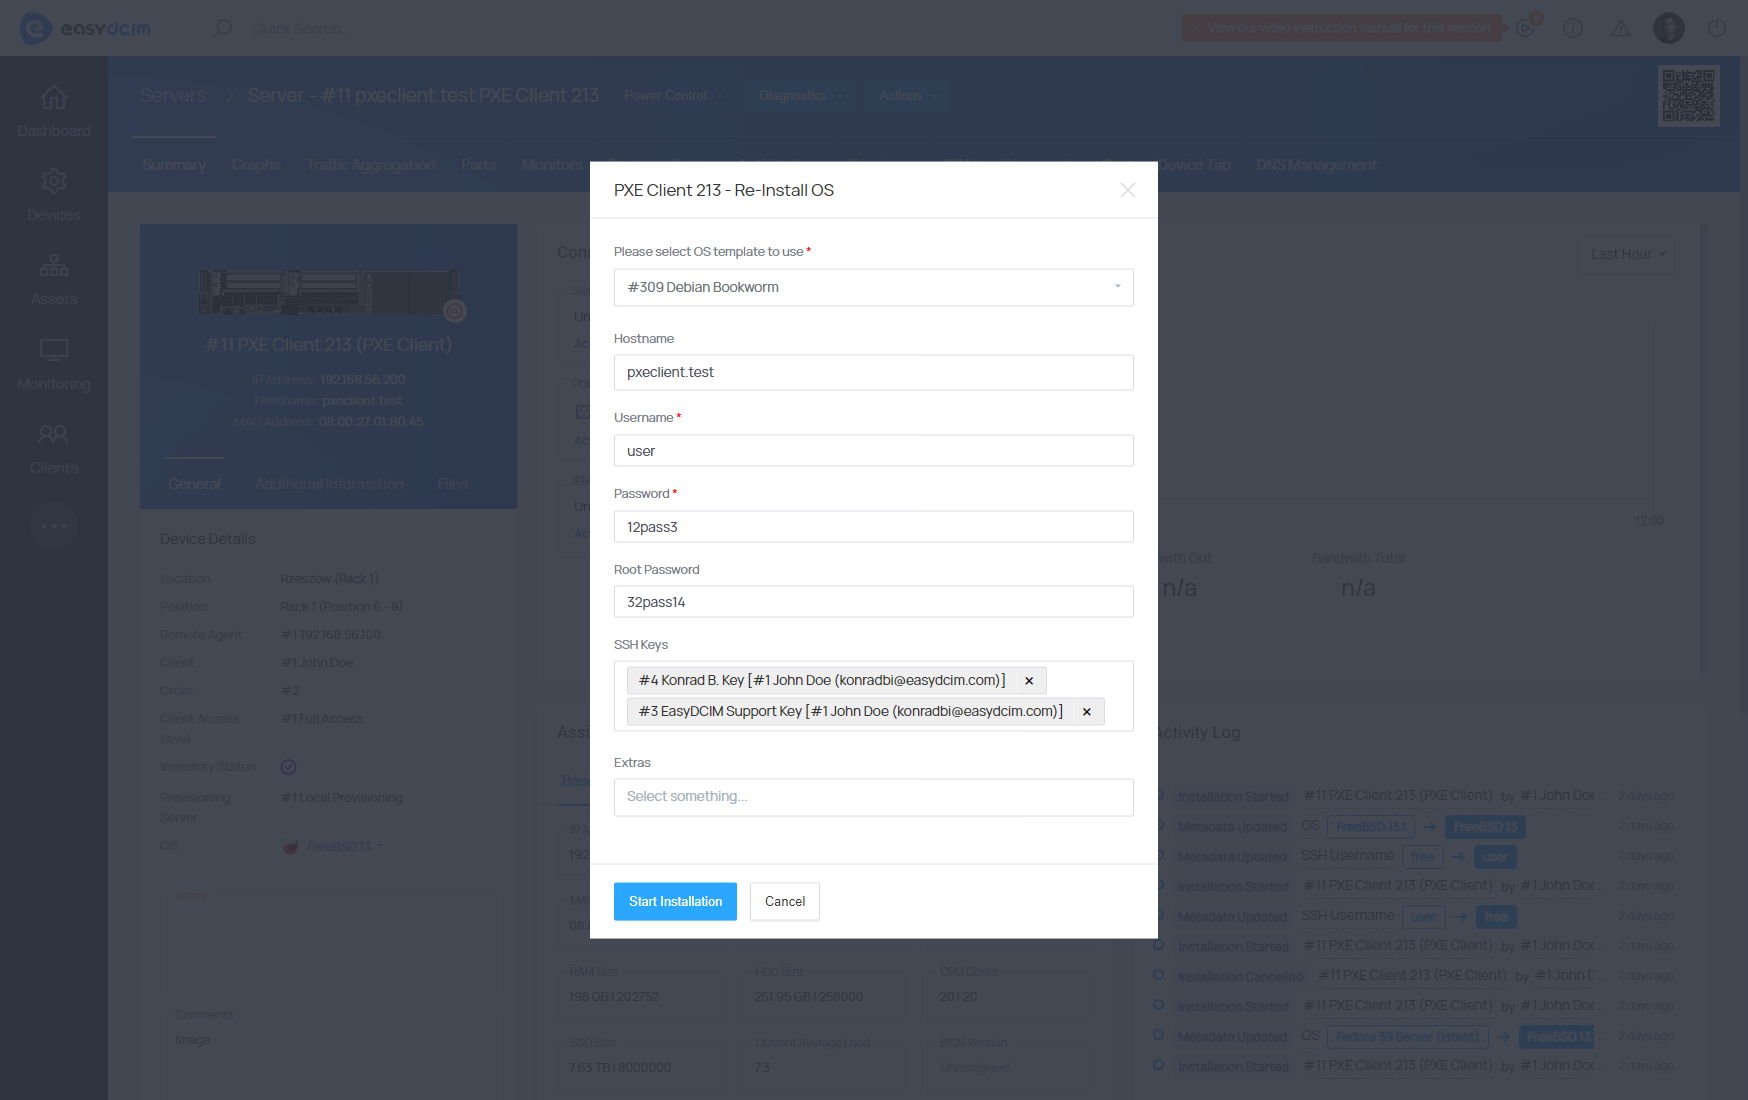
After configuring the network settings, you can initiate the operating system installation. To do so, choose the ‘Re-Install OS’ option from the action menu. In the configuration fields, specify the following:
- OS Template - decide which OS installation template to use (it can be an operating system or a diagnostic tool).
- Hostname - the hostname value is automatically downloaded from the device’s Hostname metadata and can be freely changed. This will be the hostname of the operating system that will be installed on the target server.
- Username - the username value is automatically downloaded from the SSH username of the device and can be freely changed. This will be the name of a standard user of the operating system that will be installed on the target server. For systems in the Windows family, this is always “Administrator”.
- Password - the password value is automatically downloaded from the device’s SSH Password metadata and can be freely changed. This will be the password of a standard user of the operating system that will be installed on the target server.
- Root Password - the root password value is automatically downloaded from the SSH Root Password of the device and can be freely changed. This will be the root password of the operating system that will be installed on the target server. Used only for systems from the “Linux” family.
The installation will start shortly after clicking the ′Save Changes and Start Install′ button.
The whole installation process is fully automatic. Depending on the chosen installation template, the installation time may vary. You can track the progress of the installation using the ‘Provisioning Log’ function. Once the installation has been completed, you can log in to the SSH server based on the data entered in the previous form.
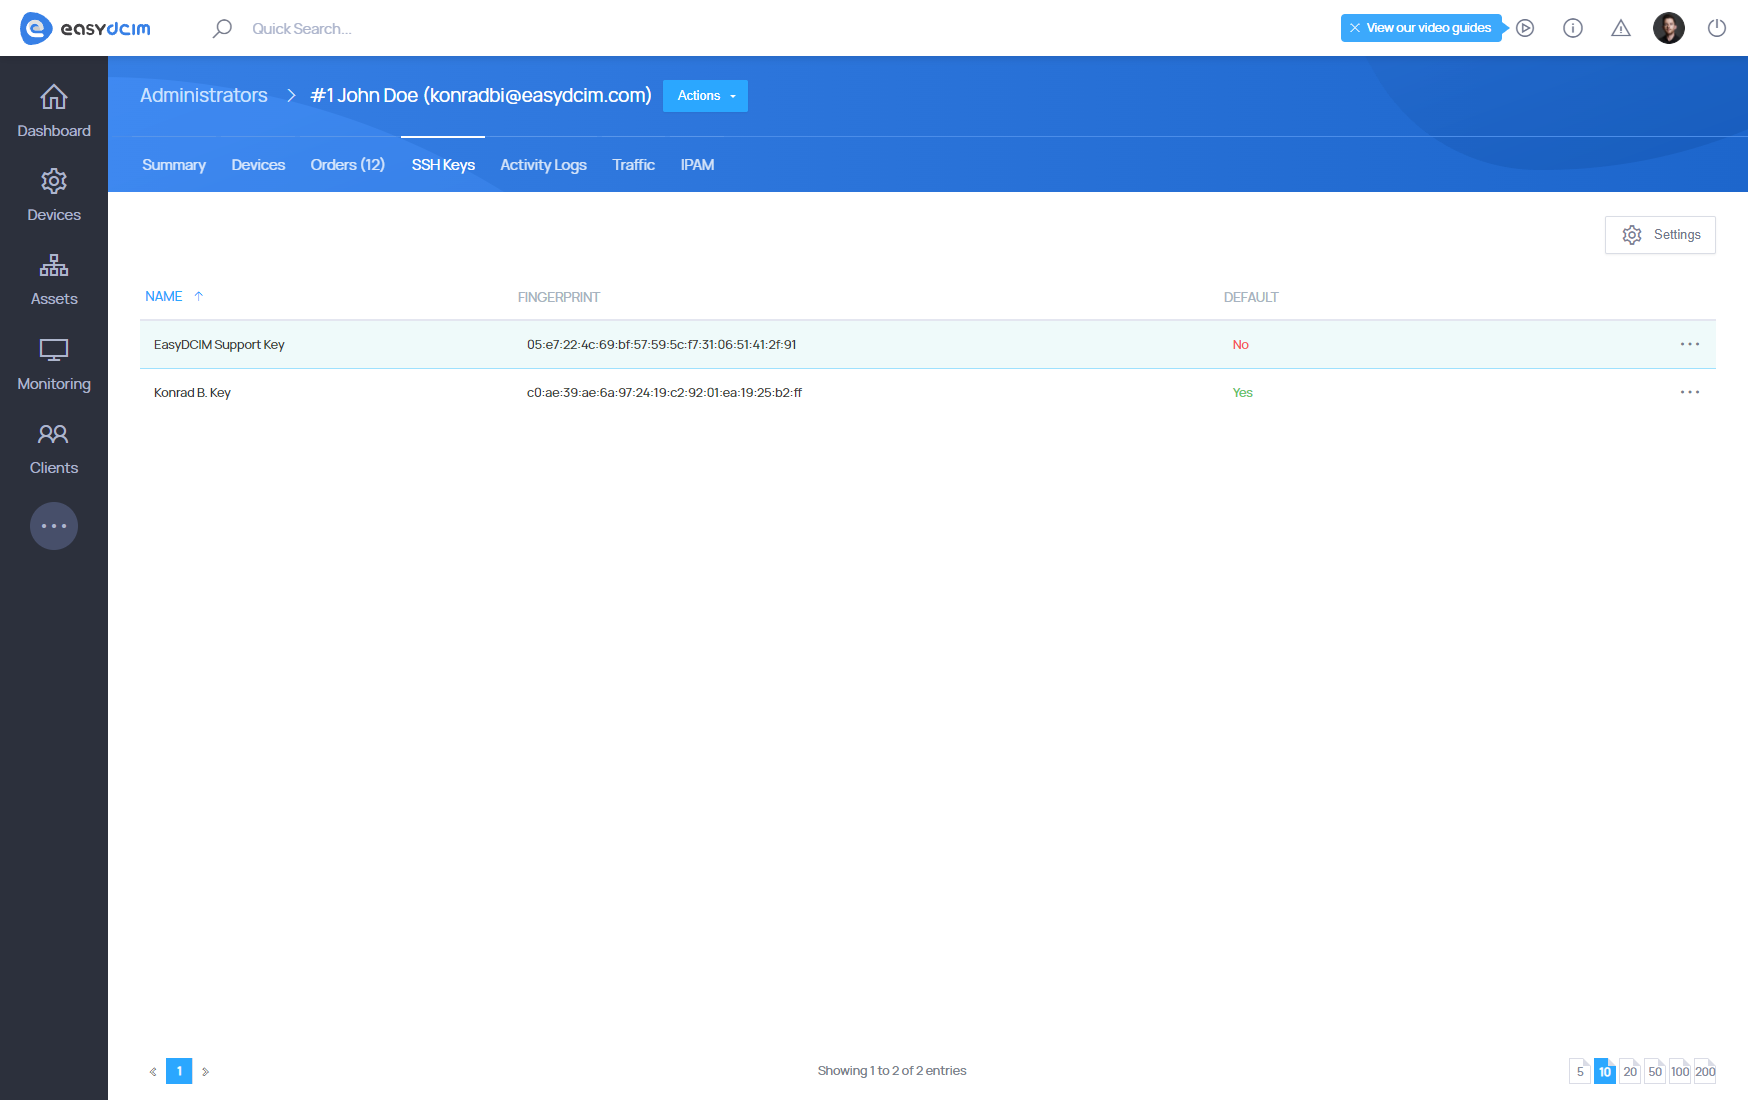
SSH Keys for OS Installation
During the operating system installation, you have the option to define SSH keys for the user account. It is important to note that these keys will be associated with a standard user account rather than the root account once the OS installation is finished.
Each administrator and client can manage their public SSH keys. You can add keys in the administrator account summary view as well as in the client details section. To add a new SSH key, proceed to “Clients” → “Client Summary” and then select the “SSH Keys” tab.
The SSH2 public key in the OpenSSH format will start with “ssh-rsa”.
During the OS installation, you can select the previously added keys. Once the OS installation is complete, you can remotely log in to the dedicated server from SSH with a private key. SSH key support has been implemented for most Linux family systems. It is not available for rescue templates and Windows family systems.
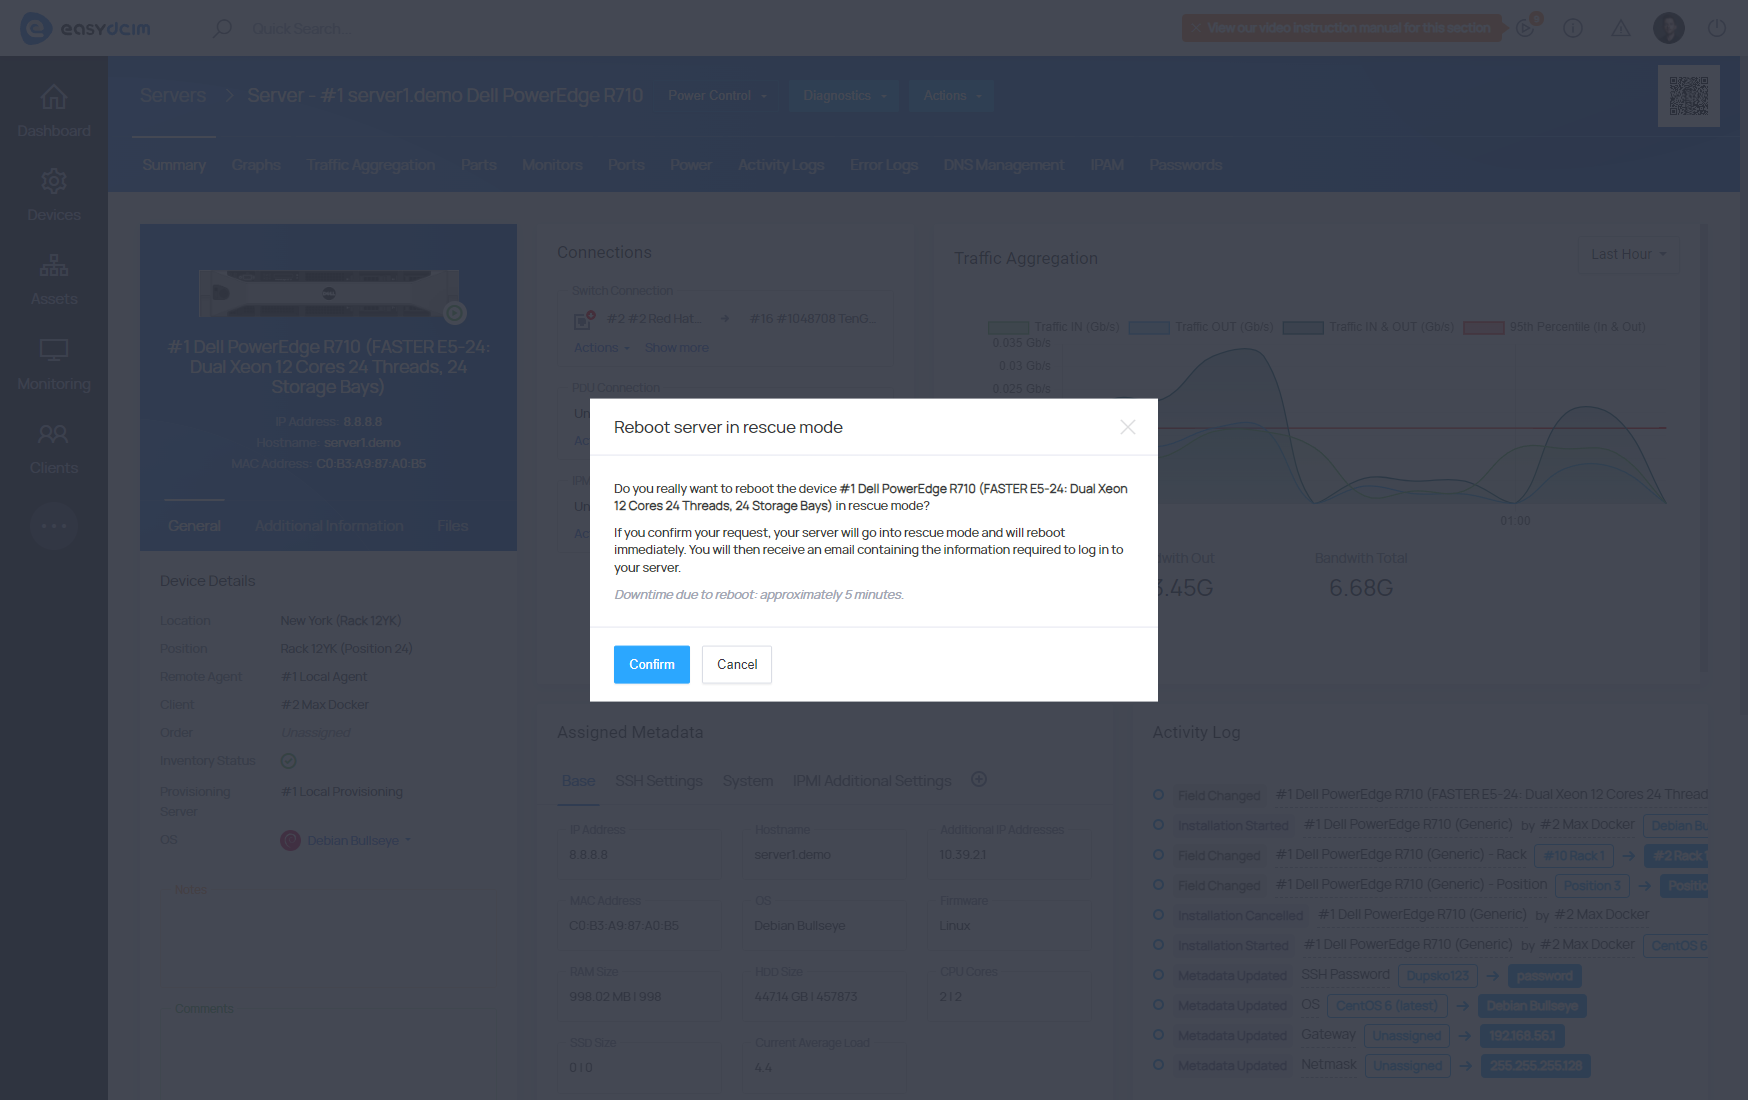
Rescue mode
To start the rescue mode, you need to go to the summary view of the dedicated server. Once you click the “Summary” button, you will be redirected to the summary view. In the OS section, choose the “Rescue Mode” option.
If you use the predefined “Rescue Mode” template, the dedicated server will be automatically restarted and the appropriate operating system will be booted into the operating memory. After a few minutes, the SSH login credentials will be sent to the server owner’s email address. When you log in to the “/home/rescue/partitions/” directory successfully, you will have access to all the system partitions mounted automatically from the base system.
This solution proves useful when recovering data from a damaged base operating system. You can easily transfer the data from the respective partitions to another external device.