Switch Management Extension
About
Switch Management For EasyDCIM extension allows you to manage devices like switches or routers in the system. The default driver supports most devices commercially available, such as Dell, HP, Netgear or 3COM. With the extenion we can remotely control the ports of the devices through the enable/disable port actions. The extension also collects summary statistics concerning disabled/enabled ports, inbound/outbound error packets and inbound/outbound discarded packets.
Features
- Control State Of Any Switch Port Remotely
- Automatic Switch Port Turning On/Off On Suspension/Unsuspension/Termination Of Any Chosen Product
- VLAN Management Support For
- Arista VEOS Devices
- HPE Comware Software Devices
- Juniper Devices With JUNOS 12.3R12-S12 And JUNOS 20.X
- Disable/Enable Network Port Using Arista eAPI
- View Switch Locations Map With The Number Of On/Off Ports
- Access Detailed Information About Each Switch Port
- Disable/Enable Network Port Using NETCONF Protocol
- View Aggregate Statistics
- View General Graphs:
- Ports Summary
- Error Summary
- Packets Summary
- View Event Logs
- Supported Switch Manufacturers (SNMP Protocol):
- Cisco
- Dell
- HP
- Juniper
- MikroTik
- Netgear
Adding switch/router devices
Adding devices in the system can be accomplished in several ways. We can do this through filling in the Adding New Device form and providing the appropriate IP address of the device, along with completing other data respectively. We can also use the Auto-discovering form, so the system will automatically detect all data on the device and update it within the system itself. After the successful process of adding the device, we must configure SNMP protocol settings.
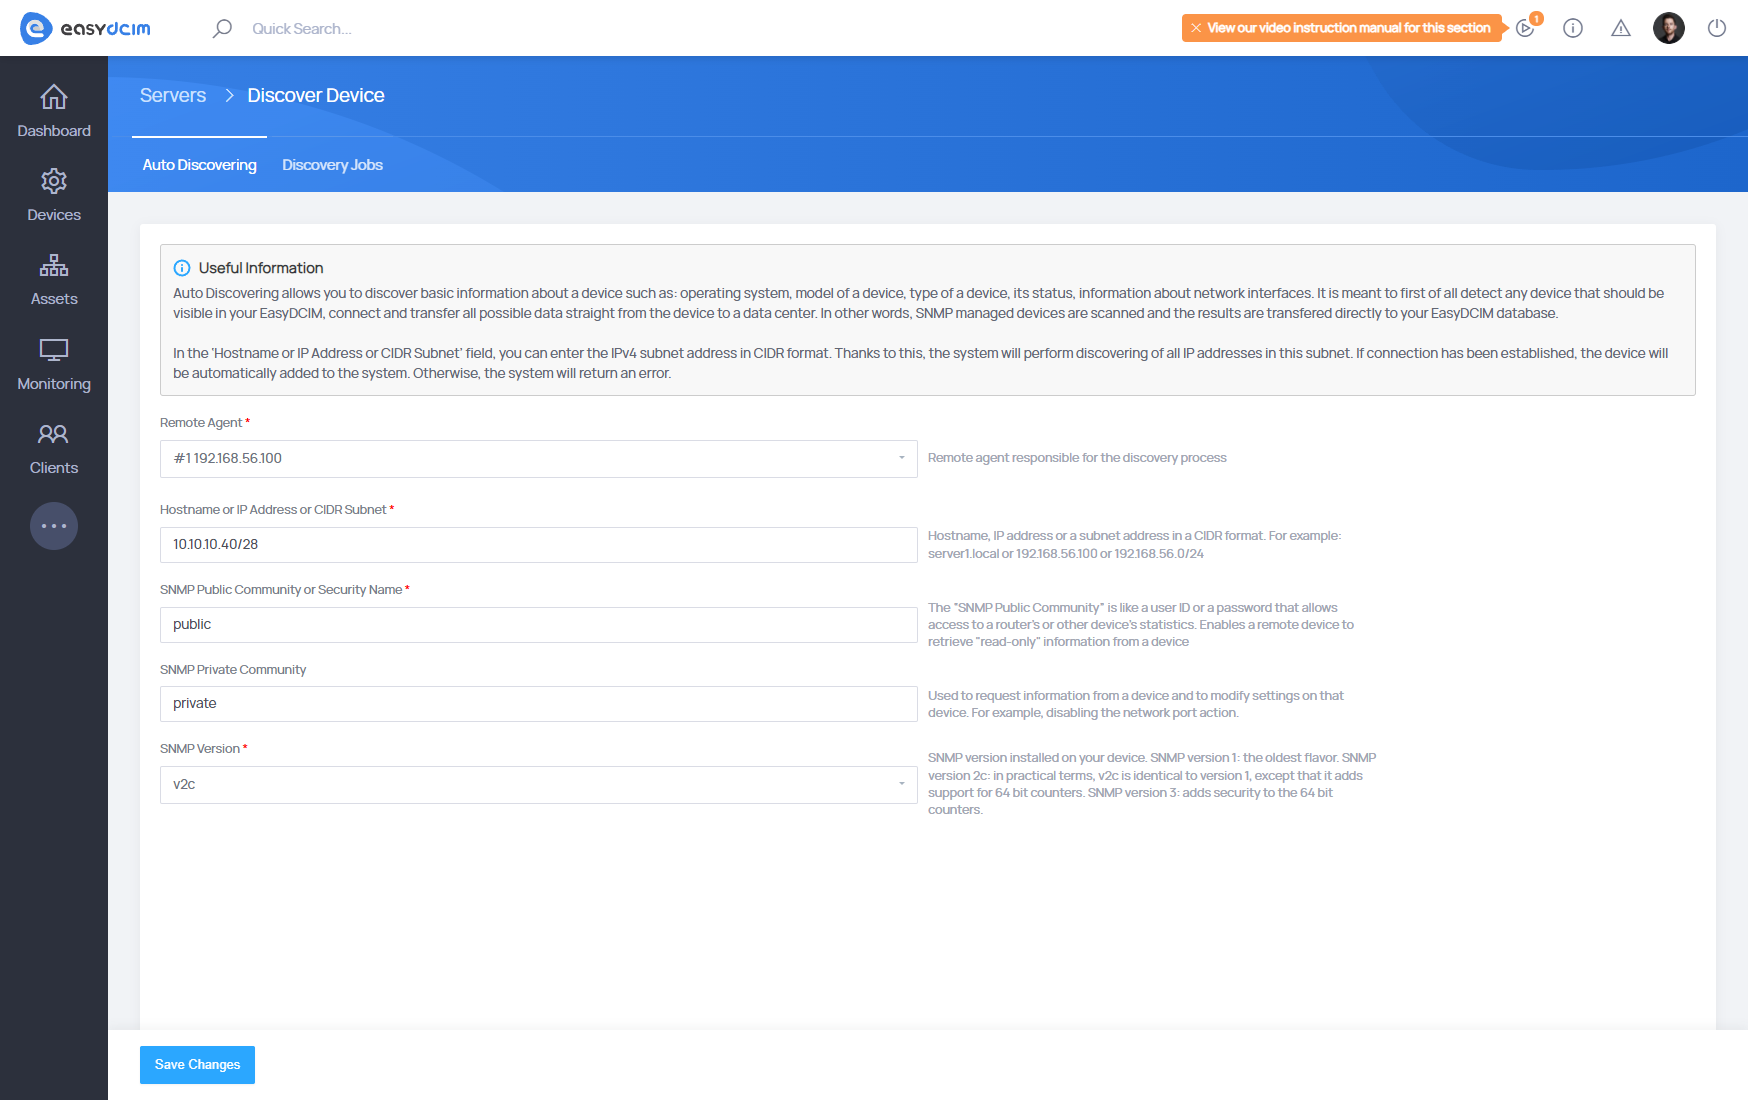
Please move to a summary page of a device you are interested in and use the Action button located in the header. There you will find the Settings section.
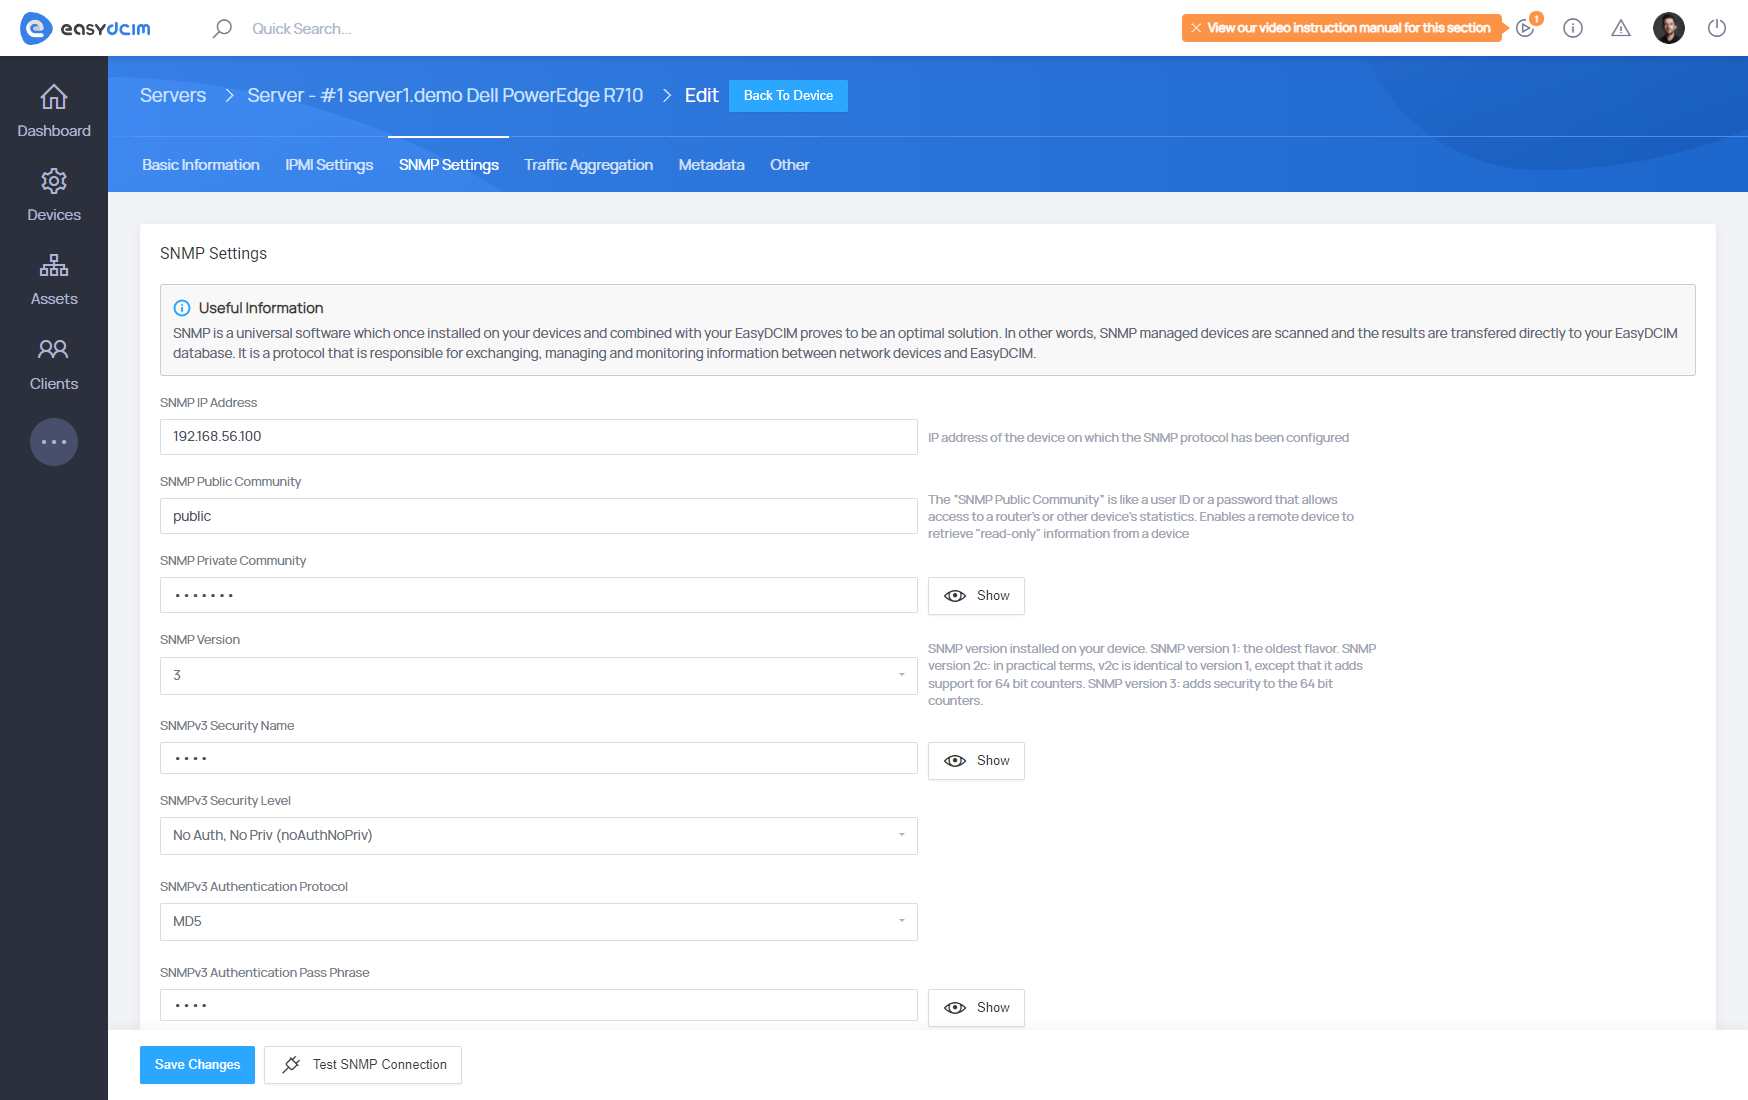
SNMP Settings
In order to configure connection to SNMP, select ‘Edit’ from the ‘Actions’ menu that can be found in the server summary view.
The form includes a couple of required fields, such as the SNMP IP Address where you need to specify the IP address of the server, and the SNMP Public Community where the public password should be provided.
Additionally, the administrator can specify the SNMP Private Community, that is the private password and choose the version of the SNMP protocol that is configured on the server. If the third version has been configured on the server, you need to fill in additional fields used for connection.
Once the form has been filled out and changes saved, you can test the entered data. After you press the ‘Test SNMP Connection’ button, the system will check the validity of the SNMP connection basing on the following OID in a repository: SNMPv2-MIB::sysObjectID.0.
If the value is retrieved, the system will consider the SNMP connection to be correct. Otherwise, an appropriate error will be displayed.
The SNMP connection will be established soon after saving the data. The first details about the device will appear after minimum 15 minutes. Afterward, the information is collected in 5-minute intervals.
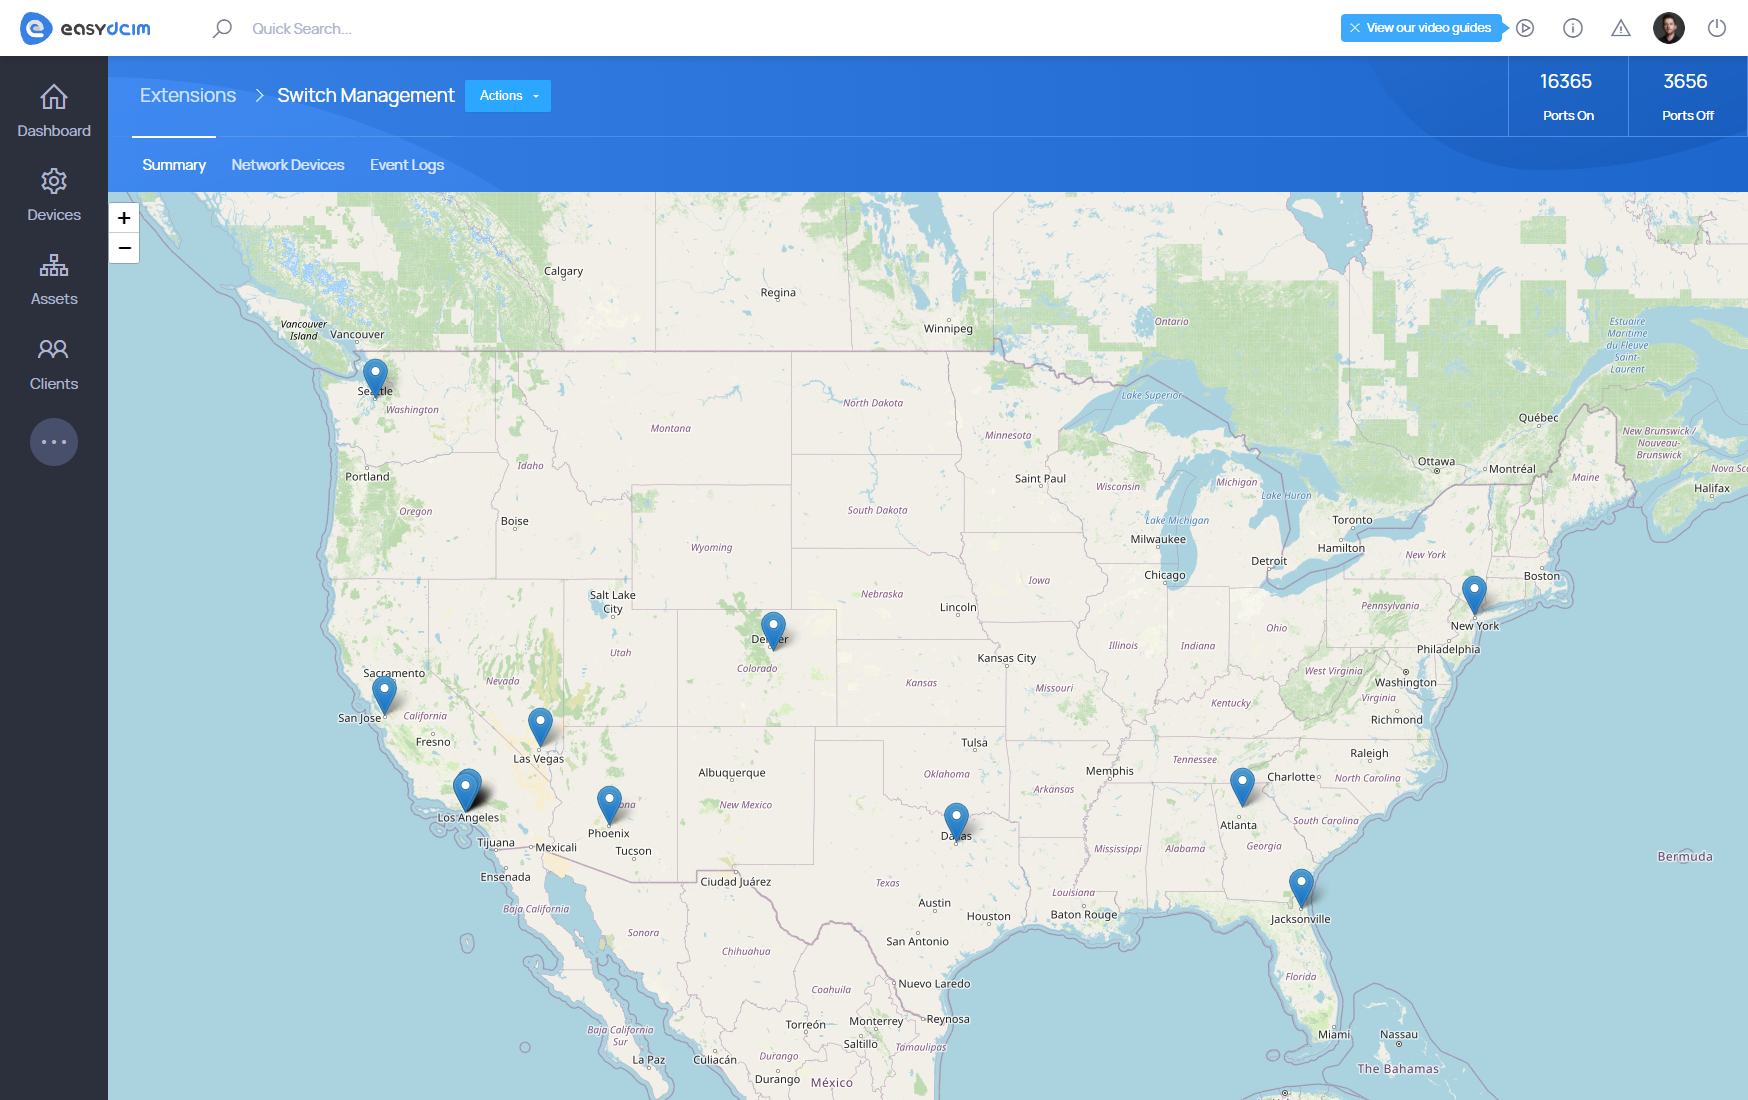
Extension main view
The main view of the extension presents a map of the existing locations in the system, along with the number of UP/DOWN ports for the given location. Due to that the administrator knows whether there are any more free ports on the switches to connect devices to them.
Device list
Proceeding to Device List in the view of the extension, we can see a list of all Switch/Router devices that have been added in the system. The list shows basic information about the device and the number of enabled/disabled ports. At the top of this section also details on the total number of on/off ports for all devices can be found.

Using the action menu we can move to a summary of the particular device.
Device summary
In this section data is collected in the real time using the SNMP protocol. In the left Summary box, we see basic information about the device. Box Ports (Operational States) presents information on the status of ports (Operational State) for all ports of the particular device. Box Ports (Admin States) presents information on the status of ports (Admin State). We can easily manage individual ports by clicking on the graphic of the appropriate port. Please note that when you try to switch it off/on, the port’s admin state is changed.
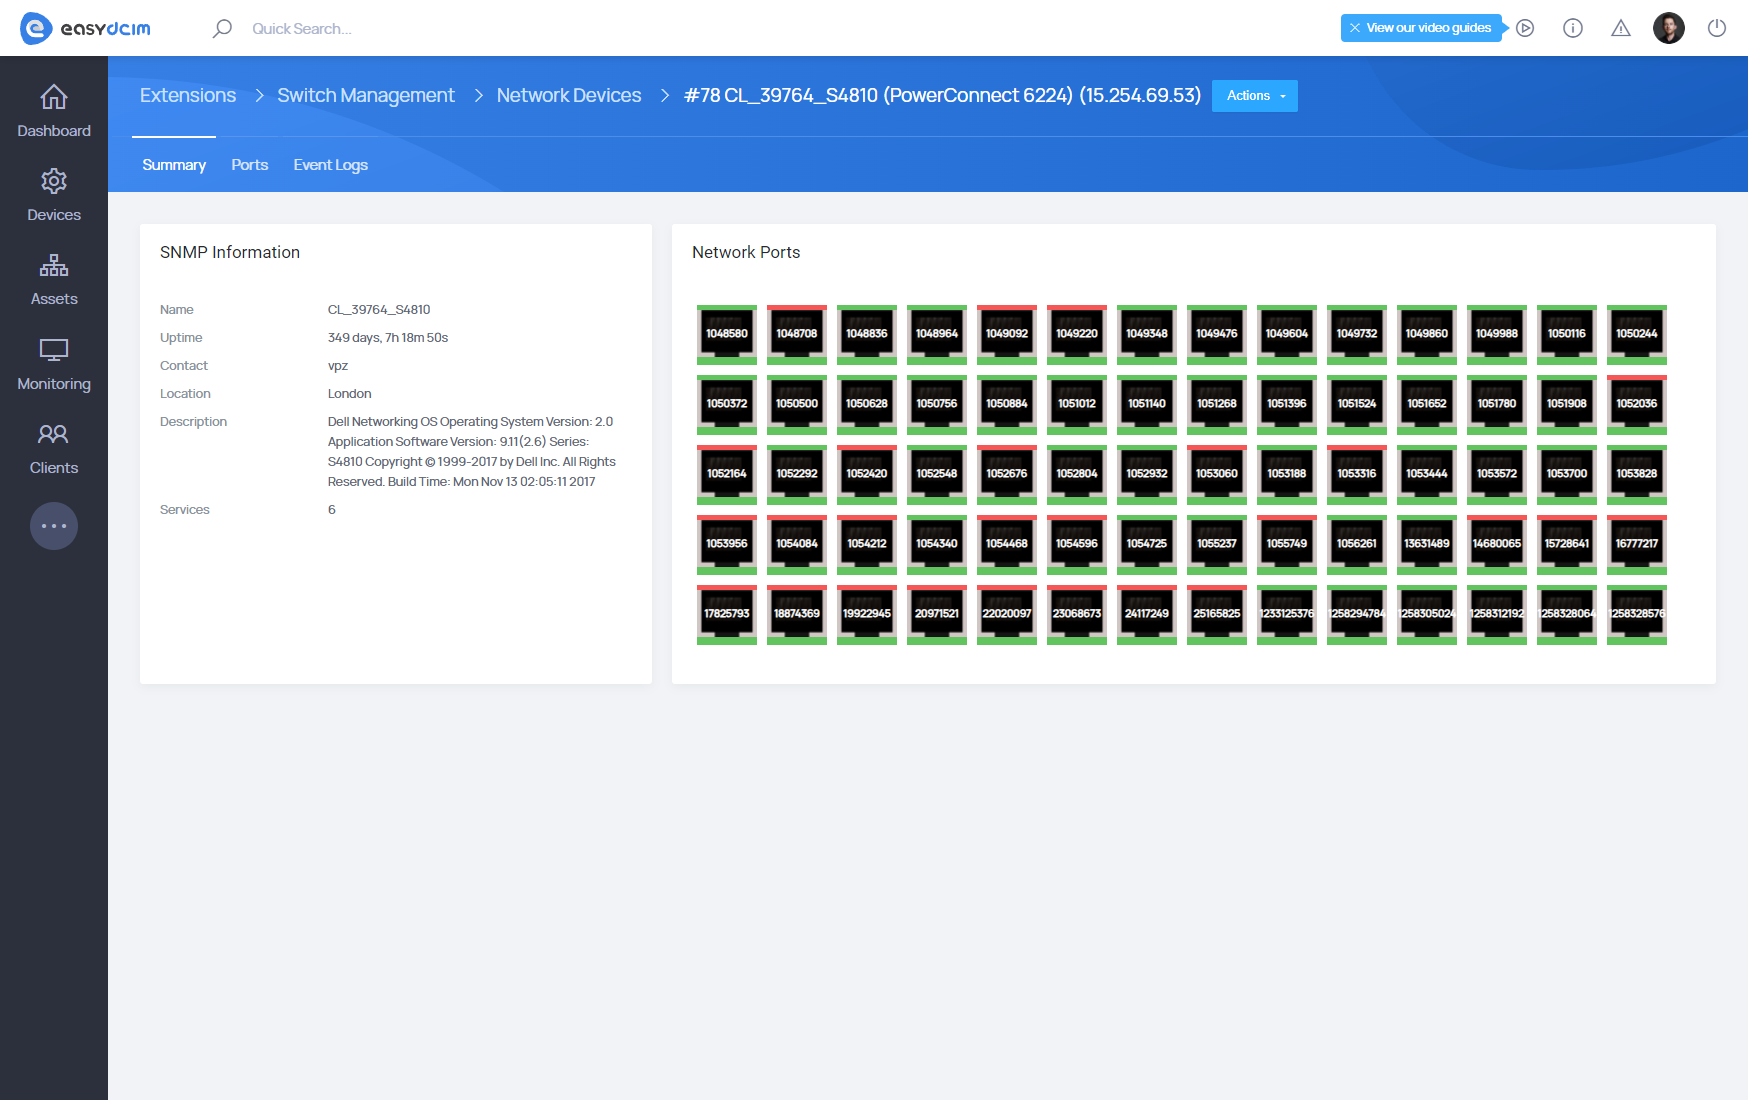
Using the Ports tab, we can see advanced information about all ports of the device in the form of a table. To retrieve data faster, the cache mechanism, which is automatically reset after 5 minutes or during performing actions on a specific port, has been applied in this section.
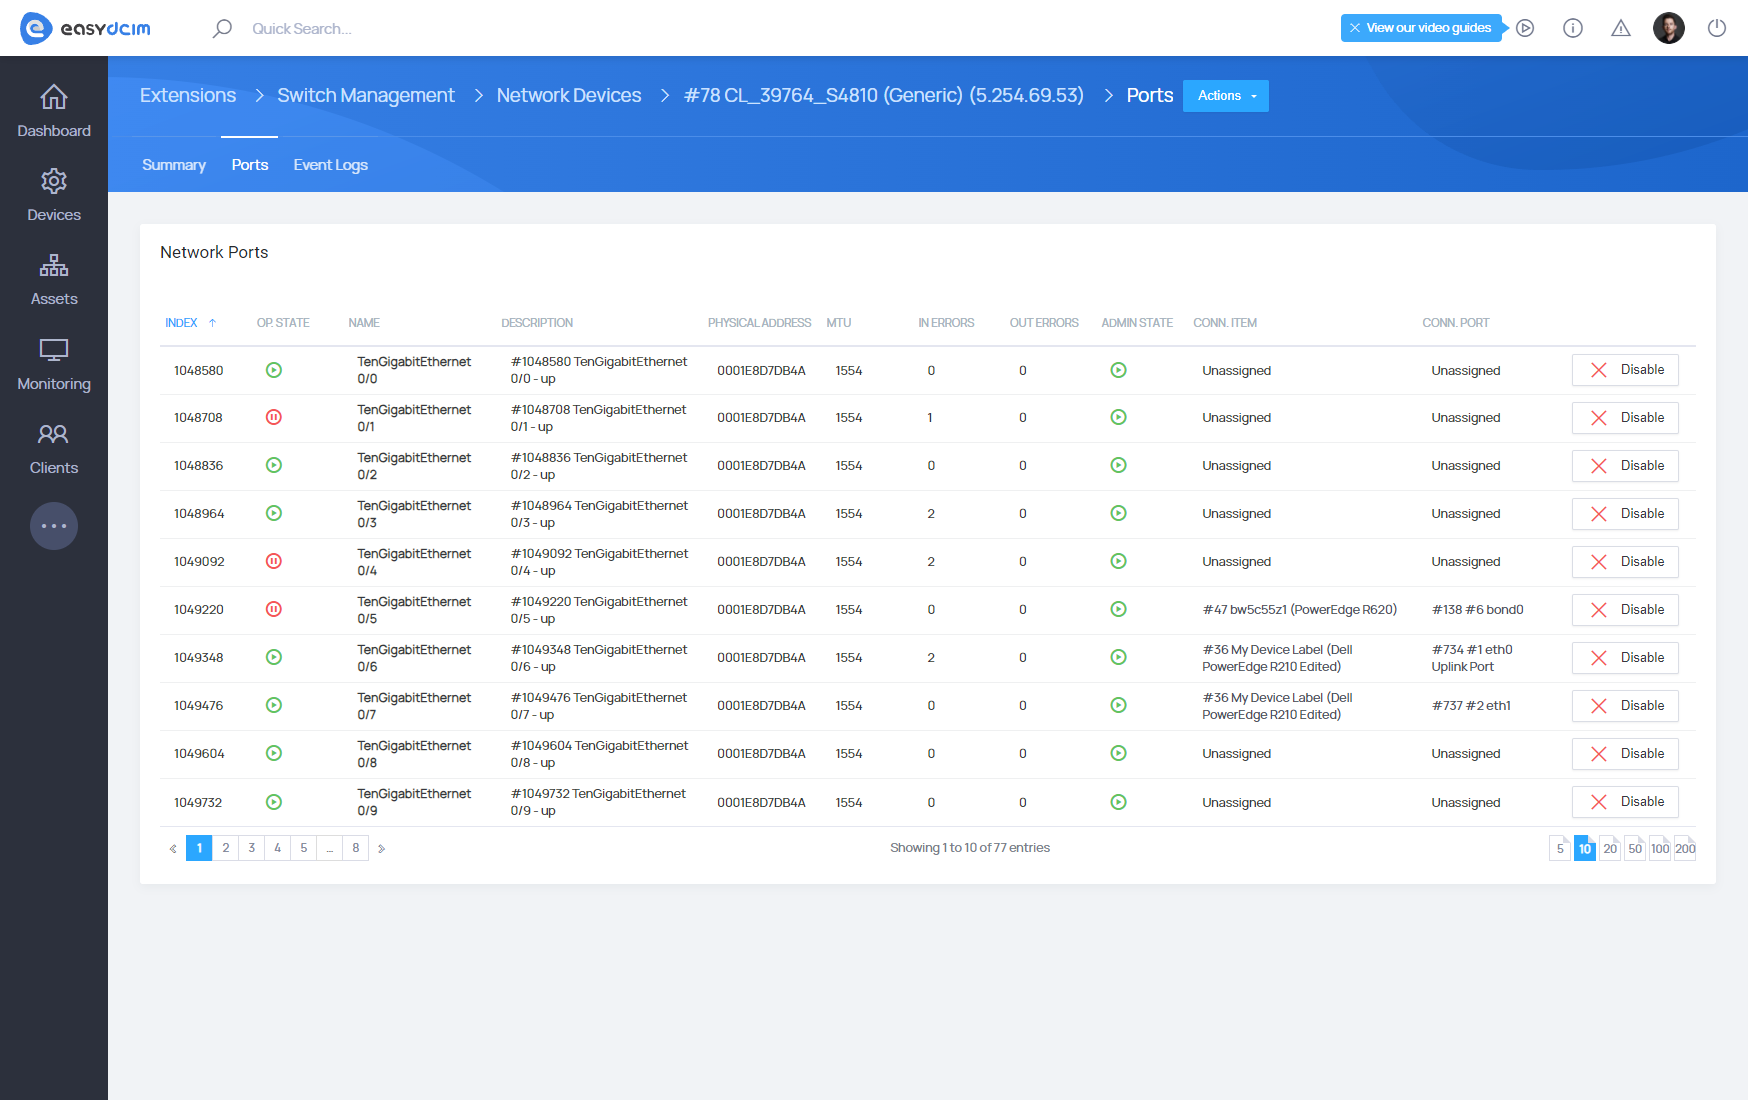
From here we can also manage the statuses of the port through the actions such as Enable or Disable (depending on the current state of the Admin State). All actions performed on the device are logged and can be seen proceeding to the Event Logs tab.