IPMI Proxy
The extension enables the proxy connection between the EasyDCIM platform main server and the private IPMI network. It is one of the remote agent components and can only work with this remote agent. Here are the functions supported by the component:
- running the boot/reboot/shutdown actions directly on the remote agent server using the ipmitool command,
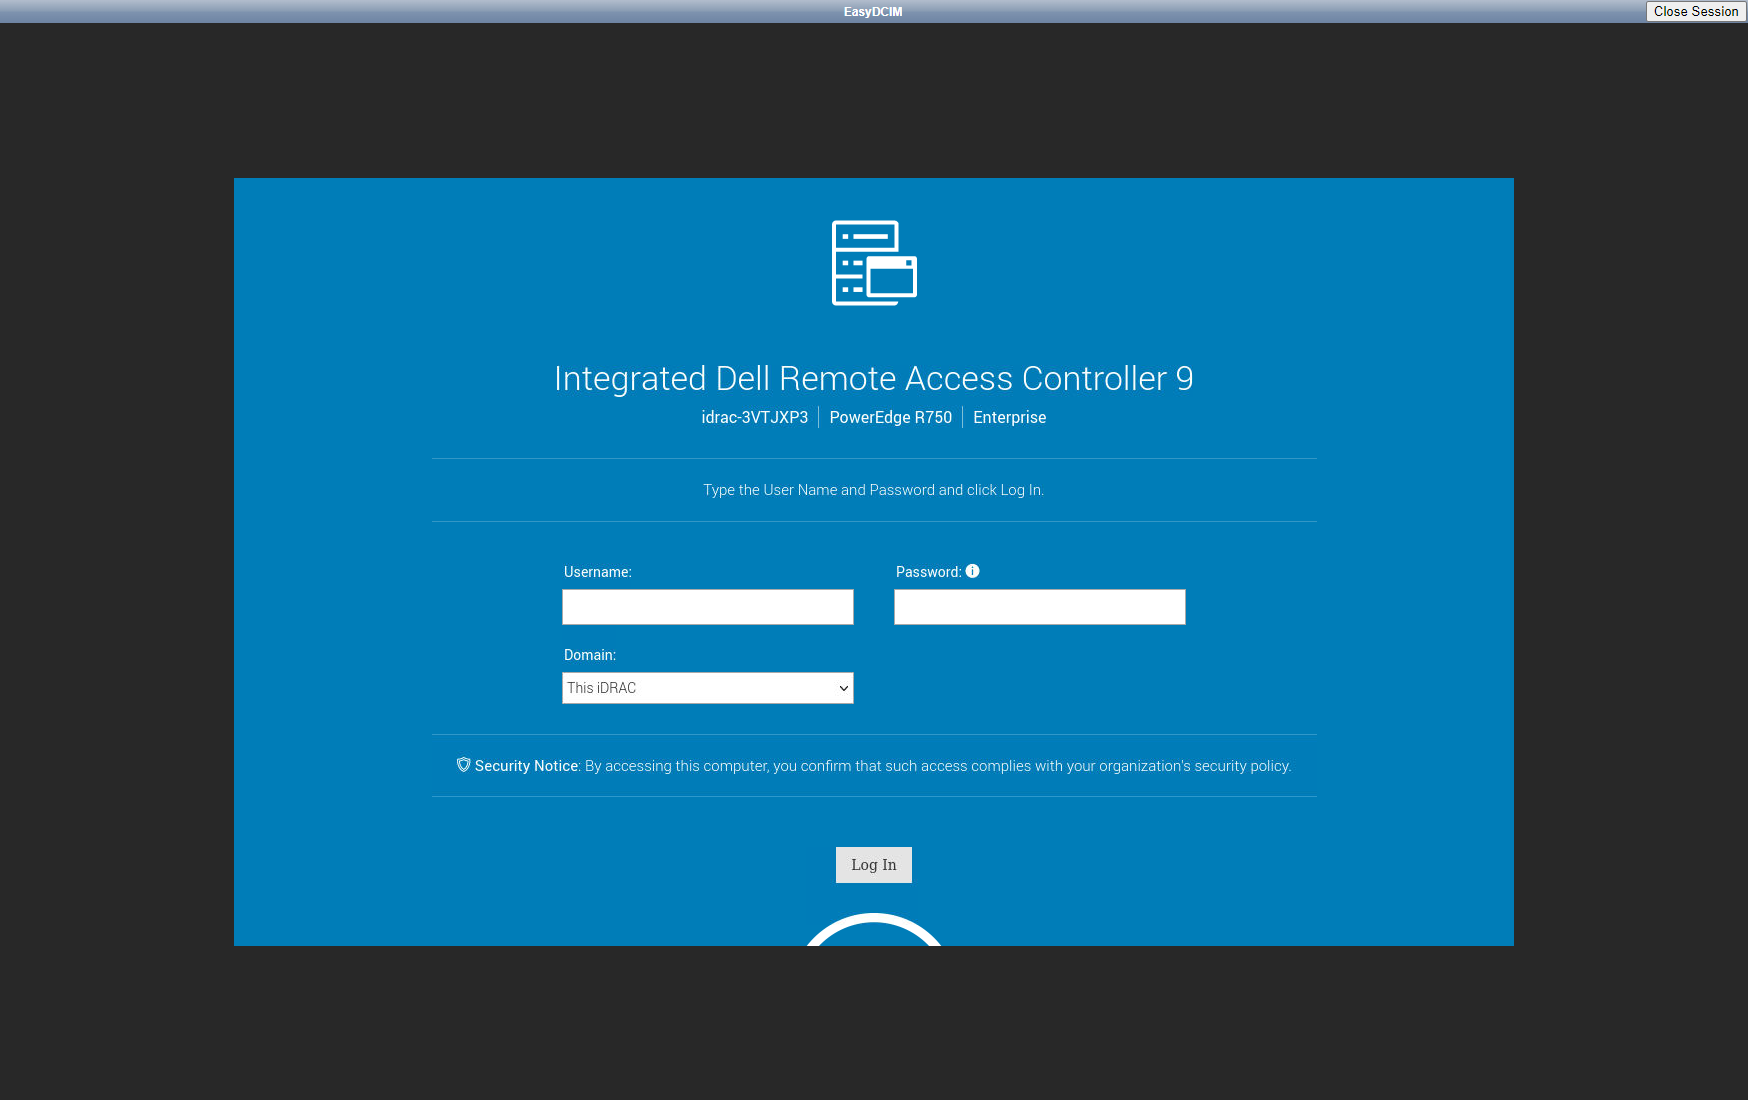
- downloading a JAVA KVM applet directly to the remote agent server from the IPMI manufacturer’s factory panel using appropriate CURL commands,
- starting a noVNC session along with a running JAVA KVM applet or the manufacturer’s factory panel.
Requirements
The remote agent server should have access to the internal network in which the IPMI IP is located. The proxy server can have both a public and private IP address, but it must be available from EasyDCIM control panel. It is possible to configure proxy on the EasyDCIM server (local agent), but we advise against it since every time you are using a proxy server with third-party software installed, the risk of unauthorized access to the target server significantly rises. Finally, please keep in mind that proxy increases the load on the proxy server, consequently slowing down the application.
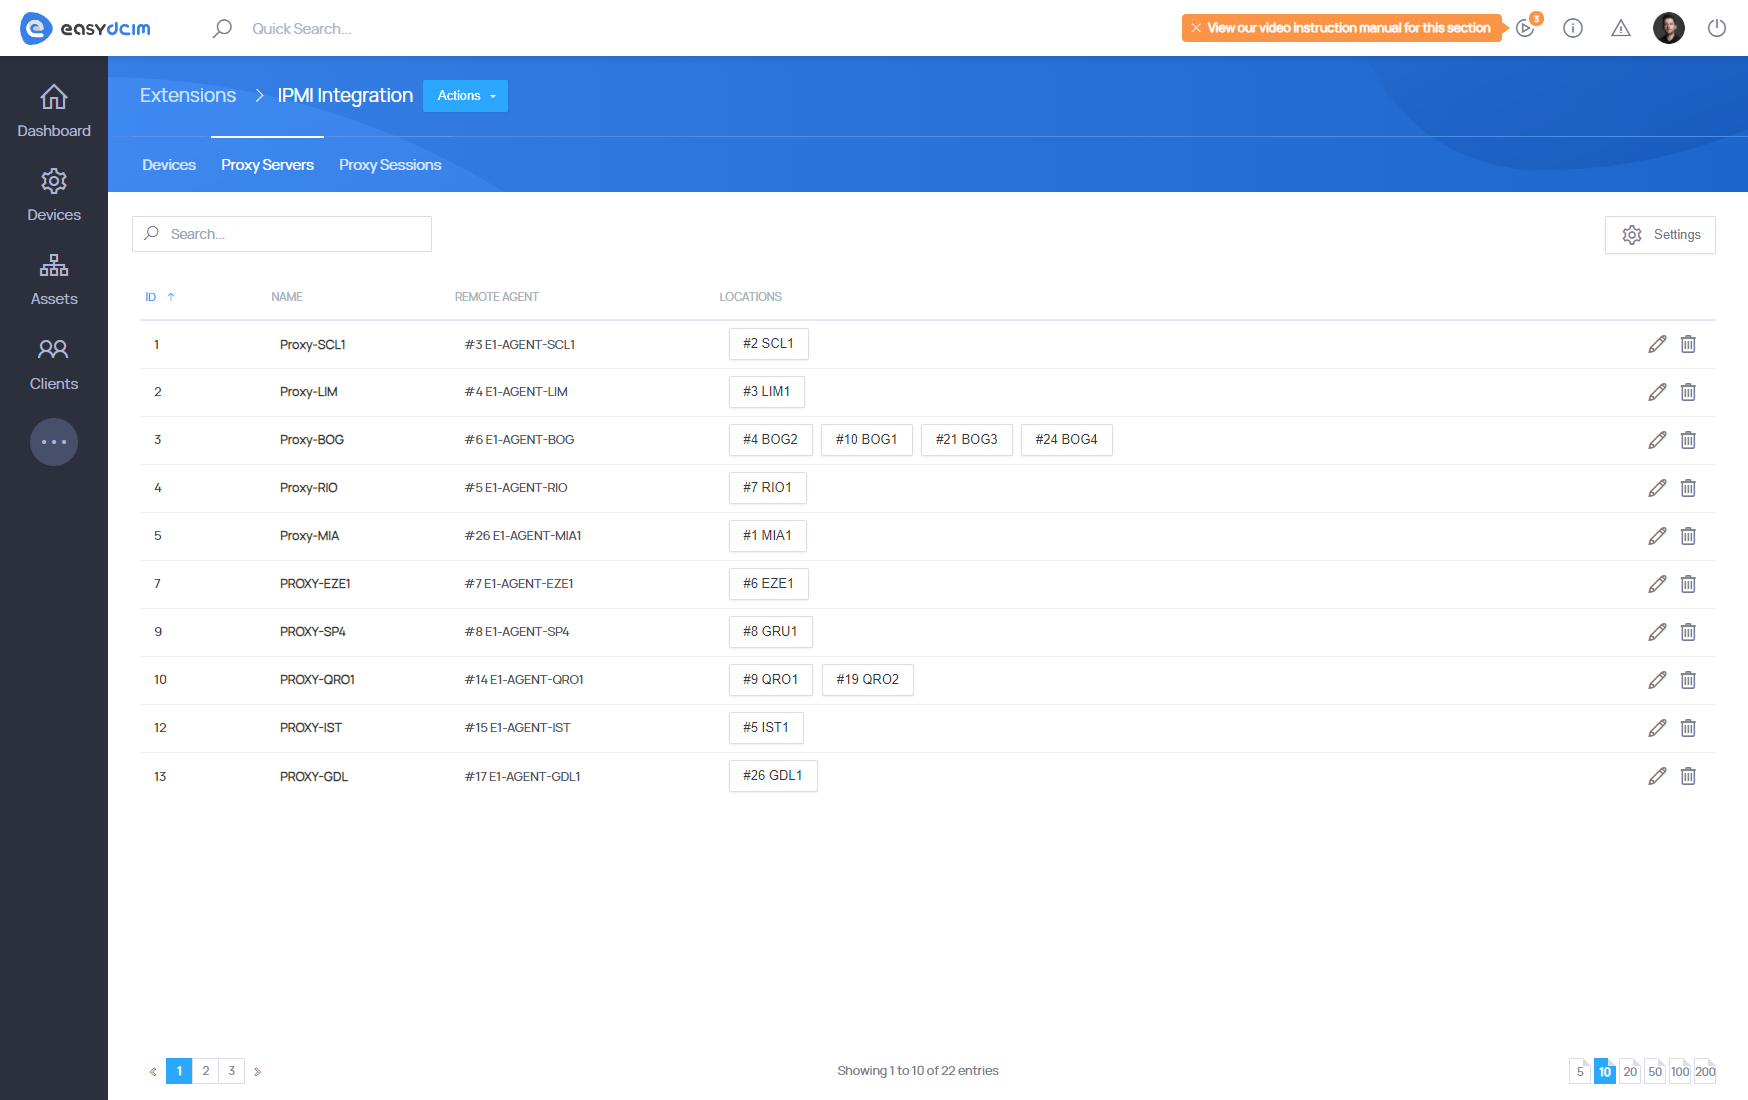
Adding IPMI Proxy servers
You can add and configure an IPMI proxy server from the IPMI Integration extension. The form for adding and configuring an IPMI proxy server contains the following fields:
- Name - your proxy server name.
- Remote Agent - the remote agent that operates the proxy server.
- Use in Locations - the locations within which the proxy server operates. All devices from a given location will be managed by this proxy server. You can assign one or multiple locations.
- noVNC Proxy Type - the type of the proxy server operation.
- Automatically download and run the JAVA console - downloads a JAVA KVM applet from the manufacturer’s factory panel and displays it in a noVNC session.
- Start a web browser with access to the management panel - launches the IPMI manufacturer’s factory panel and displays it in a noVNC session.
- Start a web browser in debug mode. For local use - starts the IPMI manufacturer’s factory panel in the debug mode.
- Automatically Close Sessions - specifies after what time of inactivity a noVNC session should be terminated.
- Disable Login Buttons - deactivates the IPMI Username and IPMI Password buttons in a noVNC session.
- Encrypt connection between noVNC and Websockify - determines if the connection in a noVNC session should be encrypted. Please note that this function must be based on an additional SSL certificate generated by the administrator.
- Self-signed certificate location - the location of the SSL certificate file.
Changing JAVA versions
The IPMI proxy server is equipped with several predefined versions of JAVA which are installed along with the remote agent. The available JAVA versions are:
- jdk_7u80
- jdk_8u121 (default)
- jre_8u251
If you wish to change the version of JAVA used by the proxy server, navigate to the edit form of the IPMI proxy server. The form will display the currently installed JAVA version as well as the list of available versions that can be selected.

Principle of operation
The remote JAVA console is downloaded directly from the server manufacturer’s panel, using the specific CURL commands. Additionally, to download the JAVA console, you need a public address of the IPMI interface which may lead to unauthorized access. If such a situation occurs, you can create a proxy server for IPMI connections in the application that will serve as a gateway between the application and the end user. The proxy server also channels all IPMI commands such as device power-on, restart or power-off. Owing to such a solution, none of the IPMI interfaces requires a public IP address and all important operations can be carried out in a secure private data center network..
Extension at work
- The VNC server and the software required to display the IPMI interface and the remote console will be installed on the proxy server.
- The webockify server, which redirects traffic to the VNC server and back, will start on the server with EasyDCIM.
- noVNC, which refers to websockify locally and gets an image with the IPMI interface in the browser through the VNC server will be launched on the server with EasyDCIM.
- On the EasyDCIM server, you must allow incoming traffic for the port range from 6081 to 6200.
The following operations are performed on the proxy server:
- Creates a new user called easydcim_vnc_X to be able to start the VNC server
- Installs the necessary system packages (chromium, java etc.)
- Creates an exception file for Java
- Downloading a JAVA console via the remote agent or launching a factory IPMI panel
- Creating a connection between EasyDCIM and the VNC server
Security
The proxy server uses a range of ports to establish a connection between VNC and EasyDCIM.
The range of ports used by a proxy server:
- start port: 5901
- end port: 6000
The range of ports used by an EasyDCIM server:
- start port: 6081
- end port: 6200
Please remember that access to these ports must be public.